Last updated: August 23, 2026
Ask ten painters what pressure they use and you will get ten answers, most of them delivered with total confidence. The reason they all sound right is that they are all describing their own paint, their own thinning and their own nozzle. Pressure is not a setting you copy, it is a setting you find, and the regulator is the part that lets you find it.
It is also the part most likely to be missing, vague or badly calibrated on a budget setup. A compressor without fine control at the bottom of its range pushes you into painting too high, and painting too high is behind a startling share of the problems people blame on their airbrush.
This article contains affiliate links. If you buy through them, we may earn a commission at no extra cost to you. Learn more.
Quick Answer
What PSI should you set on an airbrush regulator?
- Fine detail and glazes: the low end, roughly 10 to 15 PSI, with well thinned paint.
- General basecoating on miniatures: roughly 15 to 20 PSI.
- Primer and larger surfaces: roughly 20 to 30 PSI, higher if the paint is thick.
- Set the number with the trigger held open, not with the airbrush closed.
Bottom line: these are starting points, not rules. Adjust pressure and thinning together, and judge the result on a test card.
What the Regulator Is Doing
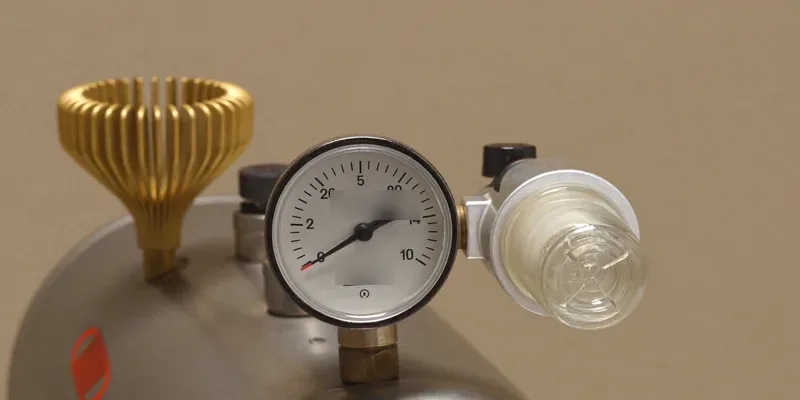
It takes whatever pressure the compressor or tank happens to be at and hands your airbrush a lower, constant pressure that you choose. Without one, the brush sees the full output of the pump, which is far too much for hobby paint and cannot be adjusted except by pinching the trigger, which is not adjustment.
A good regulator holds its setting while air is flowing, which is harder than it sounds. Cheap ones are accurate when nothing is moving and sag once you open the trigger, which is why the pressure you set is not always the pressure you get.
Static Pressure and Working Pressure Are Different Numbers
With the airbrush closed, no air moves and the gauge shows the pressure sitting in the line. Open the trigger and air flows, the reading drops, and that lower figure is what is actually atomizing your paint. On a small compressor the gap between the two can be several PSI.
So set your pressure with the trigger held fully open, air only, no paint. Adjust the regulator until the gauge reads what you want while the air is flowing, then let go. If you set it closed, you are painting several PSI below the number you chose and wondering why the coverage is poor.

Pressure by Job
These ranges are a place to start, not a specification. Thinner paint sprays at lower pressure, thicker paint needs more push, and a larger nozzle needs less pressure than a small one to move the same volume. The table pairs the common jobs with a starting range and the symptom that tells you to move.
| Job | Starting range | Too low looks like | Too high looks like |
|---|---|---|---|
| Fine lines and glazes | Around 10 to 15 PSI | Spatter, paint blobs, tip clogging | Overspray, loss of control |
| Basecoating miniatures | Around 15 to 20 PSI | Patchy, grainy coverage | Dusty finish, paint drying in the air |
| Primer and large panels | Around 20 to 30 PSI | Orange peel, uneven film | Rough texture, heavy overspray |
| Thick or unthinned paint | Higher, or thin the paint instead | Sputtering and clogs | Spider webbing and runs |
Pressure and Thinning Are One Control
You have two knobs that do overlapping things. Raising pressure forces thicker paint through, and thinning the paint lets you drop the pressure. The combination that works is thin paint at modest pressure, because that atomizes finely without blasting the surface.
The common failure is the opposite: paint straight from the bottle at 35 PSI, which sprays, but lands as a dusty film because the paint is drying in the air before it arrives. Our guide to thinning acrylic paint for airbrush is the other half of this page, and the two should be read together.
Regulator, Trap and Gauge as One Assembly
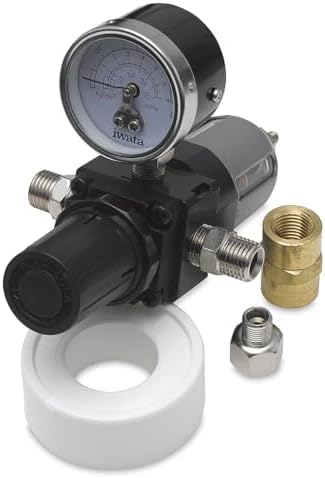
Most hobby regulators come as a unit with a moisture trap bowl underneath and a gauge on top, screwing onto the compressor outlet. That is the standard arrangement and it works, with one caveat: air at the compressor outlet is still warm, so the trap there catches less water than it would further down the line.
The stronger setup is a regulator at the compressor and a small inline trap at the brush end of the hose, where the air has cooled. Our guide to the moisture trap for airbrush explains why placement matters more than the size of the bowl.
Buying a Regulator Separately
Worth doing if your compressor came without one, if the built in one is coarse at low pressure, or if you want the control knob within reach instead of down at the floor. A small inline regulator that fits between the hose and the airbrush puts the adjustment at your hand, which sounds like a luxury until you have used one.
Check the thread before you order. Most airbrushes and hoses use 1/8 inch BSP, while shop equipment and some compressors use 1/4 inch NPT, and the adapter is a small part that is easy to forget. Our airbrush hose guide covers the fitting sizes and which adapters bridge them.
When the Gauge Is Lying to You
Small gauges are approximate. Two units side by side can differ by a few PSI, and a gauge that has been knocked or has water in it can read consistently wrong. This is not a disaster, because you are not aiming for a number, you are aiming for a spray pattern.
Treat the gauge as a way to return to a setting that worked, not as an absolute truth. Write down what worked for a given paint and nozzle on your own gauge, and ignore the fact that someone else’s number is different. The test card tells you the truth; the gauge just helps you find your way back.

Frequently Asked Questions
Why does the pressure drop as soon as I press the trigger? Because you were reading static pressure. Air was not moving, so nothing was being consumed. The drop is normal; a large drop means the compressor or regulator is struggling to keep up, often with a small tankless unit and a wide open nozzle.
Can I airbrush without a regulator? You can spray, but you cannot control much. The brush will see full pump pressure, which is high enough to blast thin paint off the model and to atomize it into dust before it lands. A regulator is the cheapest meaningful upgrade on a bare compressor.
What pressure for primer on miniatures? Most people work in the twenties for primer, higher than for detail because primer is a thicker medium. If the finish comes out gritty, the paint is drying before it lands: come down in pressure or move the brush closer. Our airbrush primer guide has the rest.
My airbrush spatters at low pressure. Do I raise the PSI? Try thinning the paint first. Spatter at low pressure usually means the paint is too thick to atomize at that pressure, and raising pressure hides the problem rather than solving it. If it persists, check the tip for dried paint. See airbrush tip dry.
Does nozzle size change the pressure I need? Yes. A smaller nozzle restricts flow, so it generally wants a slightly higher pressure for the same paint, while a large nozzle moves plenty at low pressure. Our guide to airbrush nozzle size sets out the sizes and what each suits.
The Bottom Line
Set the pressure with the trigger open, start in the low teens for detail and the twenties for primer, and change pressure and thinning together rather than one at a time. If your compressor has no regulator or a coarse one, that is the first thing to fix, because painting at the wrong pressure produces symptoms that look exactly like a bad airbrush. Read next: thinning acrylic paint for airbrush and how to pick an airbrush compressor.