Last updated: August 23, 2026
Primer is the least interesting purchase in the hobby and the one that decides whether your paint stays on the model. It is also the first thing people try to spray through a new airbrush, usually in the same session they unboxed it, which is how a lot of first sessions end in a blocked nozzle.
Two things make it easier. Buying a primer actually formulated to go through an airbrush rather than one you have to fight, and being honest about when a rattle can does the job better. Both of those are covered here, along with the zenithal trick that is the main reason miniature painters prime with an airbrush at all.
This article contains affiliate links. If you buy through them, we may earn a commission at no extra cost to you. Learn more.
Quick Answer
Which primer should you put through an airbrush?
- A water based acrylic polyurethane primer made for spraying. Badger lists Stynylrez as airbrushing from the bottle.
- Vallejo Surface Primer is the other standard, thinned with the matching airbrush thinner if it drags.
- Use a 0.3 mm nozzle or larger. Primer is not fine detail work.
- Priming a whole batch on a cold day outdoors is still a job for a rattle can. Say it out loud.
Bottom line: airbrush primer wins on control and zenithal work, not on speed.
What Primer Is Doing
Two jobs. It gives paint something to grip, because bare plastic and cured resin are slick surfaces that acrylic will happily peel off later. And it unifies the color underneath, so a model built from parts in three different plastics reads as one object before you start.
Everything else people ask primer to do is a bonus. Filling tiny surface flaws, showing up seam lines you missed, and providing the light and shadow map of a zenithal undercoat all happen on top of those two basics.
The Two Ranges Most Painters Use
Badger’s Stynylrez is the one that comes up most in miniature circles. Badger describes it as a water based acrylic polyurethane primer that airbrushes from the bottle, and it is sold in white, black and gray as well as other shades, which covers the whole zenithal workflow from one set.
It is a thick looking product in the bottle and that alarms people, but the polyurethane binder sprays at hobby pressure with little or no adjustment through a 0.3 mm nozzle. Shake it thoroughly and clean the brush promptly afterward, because cured polyurethane is not something you want to argue with.

Vallejo Surface Primer
The other standard, and the natural choice if the rest of your shelf is Vallejo. It is a polyurethane primer sold in larger bottles, and Vallejo points to its own airbrush thinner if you need to adjust it. Some painters spray it neat, some add a little thinner, and the difference is mostly nozzle size and personal preference.

Zenithal Priming: the Real Reason to Bother
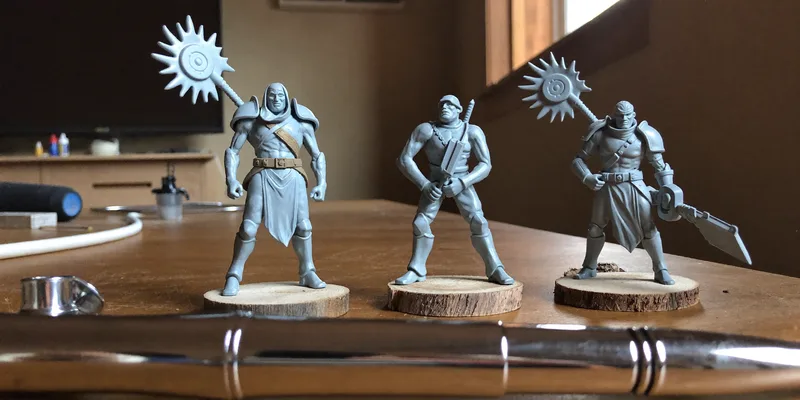
Zenithal priming is why miniature painters own an airbrush at all, for many of them. You prime the whole model black, then spray white or a light gray from above at a steep angle, leaving shadow in the recesses and light on the upper surfaces. You have painted the lighting before you have painted a single color.
From there you can glaze thin color over the top and let the underlying values do the shading, or simply use it as a guide for where highlights belong. It is impossible to do properly with a rattle can and trivial with an airbrush, which is the clearest case for spraying your own primer.
How to Do It Without Losing Detail
Thin coats, low pressure, and stop earlier than you think. The failure mode is a thick white coat that fills the crisp edges you paid for. Build it up in passes with the model turning, and accept a slightly patchy transition; the color coats will smooth it out. Our guide to airbrushing miniatures covers the sequence in full.
When a Rattle Can Is Honestly Better
Three situations. Priming a large batch, where a can is simply faster and you are not doing anything clever with the coverage. Priming outdoors on a day when you would rather not carry a compressor out. And priming large terrain, where you would spend an hour refilling a cup.
There is nothing sophisticated about admitting this. Plenty of experienced painters rattle can the base coat and use the airbrush only for the zenithal layer on top, which is the fastest route to the same result. The can does bulk, the airbrush does control.
Choosing by What You Are Priming
Material matters more than brand here. Plastic kits, resin prints and metal figures all behave differently under primer, and the fix is usually preparation rather than a different bottle.
| Surface | Prep first | Primer approach | Watch for |
|---|---|---|---|
| Injection plastic kits | Wash off mold release | Thin coats, any acrylic polyurethane | Filling fine panel detail |
| Resin prints | Wash and cure fully | Light coats, let it grip | Uncured resin rejecting the primer |
| Metal figures | Scrub and dry | Polyurethane for adhesion | Chipping on handling points |
| Large terrain | Dust off | Rattle can base, airbrush zenithal | Refilling the cup all evening |
Gunpla sits in the plastic row with one extra consideration: many builders skip primer entirely on snap fit kits and go straight to color, which works because the plastic is good and the parts are not handled much. Our gunpla paint and topcoat guide covers where that shortcut costs you.

Thinning and Cleaning Primer
Primer is thicker than paint by design, so if it drags or spatters, add the matching thinner a few drops at a time rather than water. Polyurethane primers in particular do not appreciate being watered down, and the adhesion you are paying for lives in that binder.
Clean immediately. Primer that cures inside a nozzle is far harder to remove than paint, and this is the most common way people damage a new airbrush. Backflush, rinse, then a proper clean, before you make coffee rather than after. Our guide to cleaning an airbrush sets out the routine.
Frequently Asked Questions
Do I need to thin airbrush primer? Often not. Badger lists Stynylrez as spraying from the bottle, and Vallejo Surface Primer sprays neat for many painters. If it spatters or drags, add the matching thinner in small increments and stop as soon as it flows.
What nozzle size for primer? A 0.3 mm nozzle is fine and 0.35 mm or larger is more comfortable. Primer carries more solids than paint, so a very fine nozzle makes the job harder for no benefit. Detail work is what the small nozzles are for.
What pressure should I prime at? A little higher than you would use for detail work, because you are moving a thicker material over a larger area. Start low, raise it until the coat lays down evenly, and stop there rather than pushing it further.
Can I use household spray primer from a hardware store? On terrain, often yes. On detailed miniatures it is a gamble, because the coat is usually heavier and can soften some plastics. The hobby products cost more per volume for a reason and the models you care about are the wrong place to save it.
Does black or white primer matter? It changes how your colors read. White lifts everything and suits bright schemes, black deepens and suits armor and metals, gray sits in between. Zenithal priming uses two of them together so you get the benefit of both.
The Bottom Line
Buy an acrylic polyurethane primer sold for airbrushing, spray it through a 0.3 mm nozzle or larger, and clean the brush before the coffee. The real payoff is not speed, since a can is faster for bulk, it is the zenithal undercoat that maps your lighting before any color goes on. Use the can for batches and the airbrush for the layer that needs control. Read next: choosing airbrush paint and the miniature airbrushing workflow.