Last updated: August 23, 2026
The spray will not settle. It pulses, thins out, comes back too strong, and every few seconds it throws a little burst that lands heavier than the rest. You have thinned the paint, you have cleaned the brush, and it still behaves as if it is gasping. Then you look down at the cup and notice the paint is quietly bubbling while you spray.
That bubble is the most useful diagnostic in airbrushing. It means air is going backwards into the cup instead of forwards out of the nozzle, which narrows a vague symptom down to a short list of causes at the front of the brush. Nothing about the paint will fix it.
This article contains affiliate links. If you buy through them, we may earn a commission at no extra cost to you. Learn more.
Quick Answer
What makes an airbrush sputter?
- Bubbles in the cup while spraying means a loose nozzle or a failed seal at the front.
- No bubbles, uneven spray usually means a partial blockage or dried paint at the tip.
- Refit the nozzle snugly first. Never force it, brass cracks easily.
- A cracked nozzle looks fine and sputters forever. It is the last thing to suspect and the only fix is replacement.
Bottom line: check for bubbles in the cup before changing anything else. That one look sorts air problems from paint problems.
The Bubble Test
Fill the cup with cleaner or thinned paint, hold the brush level, and spray at your normal pressure while watching the fluid. If the surface breaks into a steady stream of bubbles, air is escaping backwards past the nozzle. If the fluid stays still and the spray is still uneven, the problem is a restriction rather than a leak.
This takes ten seconds and it splits the whole troubleshooting tree in half. Everything below is organized around which answer you got, because chasing the wrong branch is how people end up rebuilding a brush that only needed a nozzle nipped up.
The Free Fixes, in Order
Work through these before ordering parts. Most sputtering ends within the first two steps, and doing them in order tells you what the cause was so it does not surprise you again next month.
Backflush the brush with cleaner. Unscrew the nozzle, wipe the seat and the threads clean, and refit it snugly by hand or with the maker’s own wrench. Pull the needle back, wipe it, and reseat it until it is firmly home in the nozzle. Check the needle tip for a hook under a bright light. Then look at the nozzle O-ring or washer for swelling, splits or a flattened profile.
Snug, Not Tight
Hobby nozzles are small brass parts and they crack under enthusiasm. Firm finger pressure or a light touch with the supplied wrench is the target. A cracked nozzle produces exactly the sputter you are trying to cure, so overtightening while chasing a leak is the classic way to make the problem permanent.
If You See Bubbles: The Front End Is Leaking
Air is finding a path back into the paint channel. There are only a few places that can happen: between the nozzle and its seat, past a perished seal behind the nozzle, or through a crack in the nozzle itself. Dirt on the seating face is the most common and the easiest to fix.
Strip the nozzle out, clean the seat with a cotton bud and cleaner until it is bright, and refit. If the bubbles return immediately with a clean seat and a correctly fitted nozzle, the seal or the nozzle has failed and no amount of tightening will bring it back.
Where PTFE Tape Belongs
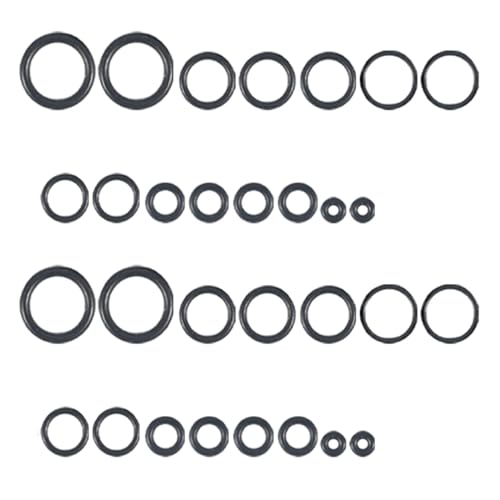
A single thin turn of PTFE tape on a threaded nozzle can restore a seal on some designs, and it is a legitimate field repair. It is not a fix for a cracked nozzle, and it does not belong on tapered seating surfaces that seal metal to metal. Check what your manufacturer specifies before wrapping anything.
If There Are No Bubbles: Something Is Restricting Flow
Then you are looking at a partial blockage, dried paint on the needle tip, or paint that is too thick to atomize steadily at your pressure. The spray in this case is usually weak as well as uneven, and it improves briefly after you wipe the tip.
Backflush, wipe the needle, thin the paint a little further and raise the pressure a step. If the spray goes clean for a minute and then deteriorates again, you are dealing with paint drying at the tip, which our airbrush tip dry guide covers in full.
The Cracked Nozzle Nobody Sees
A hairline crack in a brass nozzle is genuinely hard to spot. The brush sprays, roughly, and every clean seems to help for a few minutes before it degrades again. Owners chase paint consistency for weeks before the thought occurs to them, because nothing looks broken.
Two things point to it. First, the sputter is present with plain cleaner in the cup, not just with paint. Second, tightening changes nothing while a spare nozzle fixes it instantly. Keeping a spare nozzle and needle for your brush is the cheapest diagnostic tool you can own.

Reading Your Case
Match the row to what you actually observe rather than trying everything, since each of these causes has its own tell.
| Observation | Cause | Free fix | If that fails |
|---|---|---|---|
| Bubbles in the cup, clean seat | Failed seal behind the nozzle | Clean seat, refit snugly | New O-ring or washer |
| Bubbles with cleaner in the cup | Cracked nozzle | None, this is a part | Replacement nozzle |
| No bubbles, spray fades then recovers | Paint drying at the tip | Thin more, raise pressure, wipe | Retarder or flow improver |
| No bubbles, weak spray from cold | Partial blockage inside | Backflush, strip and soak | Cleaner and a soak |
Tools That Stop You Damaging the Brush
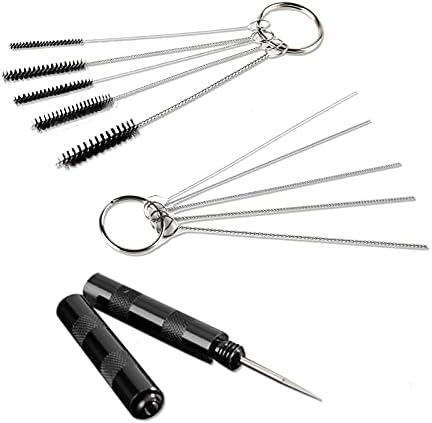
Most nozzle damage happens during troubleshooting rather than during painting, because people improvise with pliers on a part designed for a specific wrench. The tool that came with the brush is the right one, and where it is missing, a proper set costs less than the nozzle it protects.
The same applies to needles. Pulling a needle out through the front, or pushing it back in past a build up of dried paint, is how tips get hooked. Clean the channel first, then move the needle. Our airbrush replacement parts guide covers what is worth keeping in the drawer.
Frequently Asked Questions
Why are there bubbles in my airbrush cup? Air is escaping backwards past the nozzle rather than going out of the front. Usually the nozzle is loose or its seat is dirty, sometimes the seal behind it has perished, occasionally the nozzle is cracked. Clean the seat and refit before assuming the worst.
Is sputtering the same as spitting? Not quite. Sputtering is a continuously unsteady spray, spitting is discrete blobs on an otherwise fine mist. They share the air leak cause, so if you see bubbles both guides point the same way. Our airbrush spitting guide covers the water and paint versions.
Can I fix a cracked nozzle? No. A crack in a part with an opening this small cannot be sealed reliably, and attempts to fill it end up altering the spray pattern anyway. Replace it, and keep the old one only long enough to match the new part.
Does PTFE tape go on every airbrush nozzle? No. It helps on some threaded designs and does nothing on tapered metal to metal seats. Use a single thin turn where the manufacturer allows it, and never as a way to make an overtightened or damaged nozzle hold.
My brush only sputters at low pressure. Is that normal? Partly. Every brush has a pressure below which paint stops atomizing evenly, and thicker paint raises that floor. If it is smooth at working pressure and rough only at very low settings, thin the paint further rather than chasing a fault.
The Bottom Line
Look at the cup first. Bubbles mean the front end is leaking and the answer is a clean seat, a correctly fitted nozzle and, if those fail, a seal or a nozzle. No bubbles means a restriction, which is a cleaning and thinning problem. Either way, refit before you replace and never force a brass part while you are annoyed with it. Read next: airbrush needles and nozzles for what to keep as spares, and airbrush cleaner for the soak that clears the other branch.