Last updated: August 23, 2026
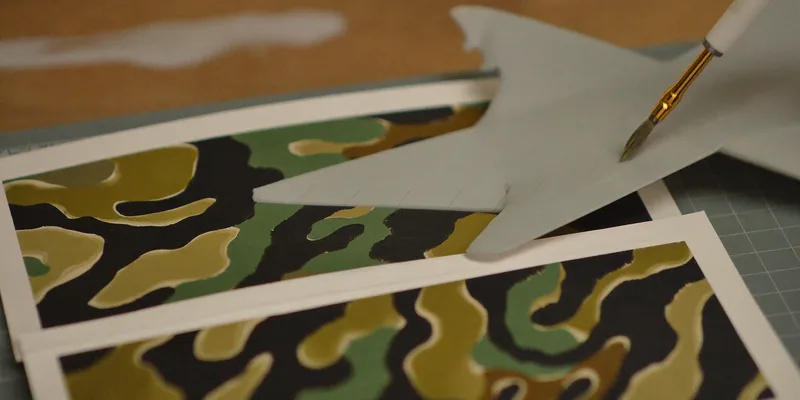
Camouflage is the pattern that stops most people from spraying a model at all. Freehand splinter camo on a 1/48 fuselage means committing to a shape you cannot undo, and the alternative, masking every edge with tape, turns an evening into a week. Stencils sit between those two, and they are the reason a hobbyist can put a convincing hard edge scheme on an aircraft in one session.
They also go wrong in a specific and predictable way. Paint creeps under the edge, the pattern comes out fuzzy where it should be crisp, and the model ends up looking worse than a careful freehand attempt would have. Almost all of that comes down to how much paint is on the brush and how hard the air is hitting the surface.
This article contains affiliate links. If you buy through them, we may earn a commission at no extra cost to you. Learn more.
Quick Answer
How do you get clean edges with airbrush stencils?
- Thin paint, low pressure, several light passes. Bleed is almost always too much paint at once.
- Spray straight down onto the stencil, never at an angle into the opening.
- Hold the stencil down at the point you are spraying, not just at the corners.
- Lift while the paint is still soft. Dry paint bridges the edge and tears.
Bottom line: stencils reward the same habits as everything else in airbrushing, thin paint and light passes.
What Stencils Are Good For on Models
Repeatable patterns you would not want to draw twice. Camouflage schemes, hazard stripes on machinery, rivet and panel textures, mesh and grille effects, and rough surfaces like chipped concrete or worn metal. Anything that has to look the same on the left and right side of a hull is a stencil job.
They are less useful for organic, one off effects. Weathering streaks, soot, and blended shading want a freehand touch, because the whole point of those is that they are irregular. Using a stencil there makes the result look stamped.
Hard Masks, Flexible Sheets and Soft Edges
Three different tools sit under the same word. A rigid stencil sheet gives a crisp hard edge and does not follow curves. A thin flexible sheet conforms to a fuselage or a turret. And a stencil held slightly off the surface gives a soft, faded transition, which is what most modern aircraft camo actually looks like.
Deciding which edge the real subject has is the first decision, before you pick a product. Hard edge schemes want the stencil flat against the model. Soft edge schemes want it lifted a millimeter or two, or replaced by a sausage of putty that holds the mask off the surface.

Texture Stencils: Mesh, Rivets and Grilles
Texture stencils are the ones people underuse. A fine mesh sheet sprayed lightly over a base color gives a woven or perforated look on engine decks and vents, and rivet patterns add a hint of surface detail on flat panels where the kit has none. Both work best as a whisper of contrast rather than as a solid layer.
Keep the pass light enough that you can still see the base color through it. The moment a texture stencil reads as full strength paint it looks printed on, and the effect that was meant to suggest depth flattens the panel instead.

Hazard Stripes, Numbers and Warning Markings
Diagonal hazard stripes on cranes, loaders and industrial machinery are a stencil classic because the spacing has to be even and the angle consistent. Doing them with tape is possible and slow. A stencil sheet gives you the repeat for free and lets you spray both sides of a vehicle the same.
The catch is registration. Getting the stripes to line up across a corner or a hatch takes a dry run with the stencil taped in place before any paint goes near it, and a pencil tick on the masking to show where the repeat should continue.

Why Paint Bleeds Under the Edge
Too much paint arriving too fast, in almost every case. A heavy wet coat has enough volume to run sideways under the stencil before it grabs, and air blasting at an angle drives it there. Thin paint, lower pressure and three light passes give you an edge that a single heavy pass never will.
The second cause is a stencil that is not held down where it matters. Taping the corners of a large sheet leaves the middle free to lift under air pressure, so hold the section you are spraying with a finger, a cocktail stick or a dab of low tack putty.
Curved Surfaces Need Something Tackier
On a fuselage or a rounded turret, a flat sheet simply will not sit down. That is what flexible masking putty and low tack masking tape are for: you shape the mask to the curve, seal the leading edge with a burnished strip of tape, and accept that the pattern will need cutting rather than lifting off a sheet.

Settings and Sequence That Work
Work from lightest color to darkest where the scheme allows, because covering a light base with a dark pattern needs fewer passes than the reverse. Let each color cure before masking over it, since fresh acrylic lifts when tape comes off.
| Effect | Stencil handling | Paint and air | Common failure |
|---|---|---|---|
| Hard edge camo | Flat on the surface, held down | Thin paint, low pressure, light passes | Bleed from one heavy coat |
| Soft edge camo | Lifted a millimeter or two | Same, but slightly further back | Edge too vague to read |
| Mesh or rivets | Pressed flat, sprayed straight down | Barely any paint per pass | Looks printed on when overdone |
| Hazard stripes | Dry fit and register first | Two passes, let it grab between | Repeat drifts across a corner |
Cleaning and Storing Stencils
Clean them while the paint is soft. Acrylic that has cured into a fine mesh is very hard to remove without stretching or tearing the sheet, and a stencil with paint sitting in its openings sprays a different shape than the one you bought. A rinse and a soft brush straight after use is usually enough.
Store them flat. A bent stencil never sits down properly again, which turns every future use into a bleed problem. Keeping them between two sheets of card in a folder is unglamorous and it works. Solvent based cleaners can attack thin plastic sheets, so check what the cleaner says about plastics before soaking anything.
Frequently Asked Questions
Why does paint bleed under my stencil every time? Because the coat is too wet or the pressure is too high. Thin the paint more, drop the pressure, and build the color in three light passes instead of one. Spray straight down at the surface rather than into the edge of the opening.
What pressure should I use with stencils? Lower than your normal basecoat setting, because high pressure pushes paint sideways under the mask. Start below where you would spray an open panel and work up only if the paint is not atomizing. Our airbrush pressure regulator guide covers dialing that in.
Can I reuse a stencil many times? Yes, if you clean it before the paint cures and store it flat. Fine mesh and rivet sheets have the shortest life because their openings clog first. Thicker camouflage sheets survive dozens of models with basic care.
Do I need special paint for stencil work? No, but it has to be well thinned, and it needs to grab reasonably fast so it does not stay wet under the mask. Our guide to thinning acrylic paint for airbrush covers the consistency that behaves under a stencil.
My airbrush keeps drying at the tip during stencil work. Why? Because stencil work involves a lot of short bursts with pauses between them, which is exactly when paint dries on the needle. Our airbrush tip dry guide covers the retarder and pressure changes that help.
The Bottom Line
Stencils make repeatable model patterns achievable in an evening, and they fail for one reason, which is too much paint arriving too fast. Thin it, drop the pressure, hold the mask down where you are spraying and build the color in light passes. Clean them before the paint cures and store them flat, and the same sheets will outlast several projects. Read next: airbrush for scale models for the brush that suits this work, and how to airbrush miniatures for the passes that come before the masking.